pygame学习笔记
前言:通过一个简单的壁球小游戏来学习pygame模块,并在学习过程中不断完善和改进,笔记内容分为四大章节:pygame最小开发框架、屏幕绘制机制、事件处理机制、色彩与绘图机制
学习视频参考:b站的嵩天教授的Python游戏开发教程(pygame)
1、pygame最小游戏开发框架
1)引入pygame和sys
- sys是python的标准库,提供了python运行时环境变量的操作,如sys.exit()用于结束游戏并退出(使用率最高)
2)初始化init()及设置
- pygame.init()对pygame内部各功能模块进行初始化创建及变量设置,默认调用
- pygame.display.set_mode(size) 初始化显示窗口,第一个参数size是一个二元元组,分别表示窗口的宽度和高度
- pygame.display.set_caption(title) 设置显示窗口的标题内容,参数title是一个字符串类型
3)获取事件并逐类响应
- pygame会维护一个事件队列
- pygame.event.get()会从pygame的队列事件中取出并删除,例如键盘按下就是一个事件
- event.type:获取事件类型并逐类响应;pygame.QUIT是pygame中定义的退出事件常量
4)刷新屏幕
pygame.display.update()对显示窗口进行更新,默认窗口全部重绘
5)最小框架代码
1 | import pygame |
6)运行结果
2、碰壁球小游戏案例
注:壁球使用植物大战僵尸中的窝瓜素材,推荐一个免费的素材网站http://aigei.com/game/?m=b_3125497
1)从需求到实现的三个关键要素
- 壁球:游戏需要一个壁球,通过图片引入
- 壁球运动:壁球要能够上下左右运动
- 壁球反弹:壁球要能够在上下左右边缘反弹
2)壁球的载入
pygame使用内部定义的surface对象表示所有载入的图像,其中pygame.get_rect()方法返回一个覆盖图像的矩形Rect对象
那么得到一个图像的外切矩形有什么好处呢?
Rect对象有一些很重要的属性,例如:top、bottom、left、right、width、height
3)壁球的移动
- ballrect.move(x,y) ,Rect对象移动一个偏移量(x,y),即在横轴方向上移动x像素、纵轴方向上移动y像素,x、y为整数
4)壁球的反弹运动(逻辑控制)
遇到左右两侧,横向速度取反
遇到上下两侧,纵向速度取反
5)填充背景
壁球移动后,原有位置将默认填充白色,因此需要重新对背景进行填充
screen.fill(color)显示窗口背景填充为color颜色,采用RGB色彩体系
6)通过Rect对象引导对壁球的绘制
- screen.blit(src,dest)将一个图像绘制在另一个图像上,即将src绘制到dest位置上。
7)节奏控制
如何有效的控制壁球的运动速度?
clock = pygame.time.Clock()创建一个Clock对象,用于操作时间
clock.tick(framerate) 控制帧速度,即窗口刷新速度
例如clock.tick(100)表示每秒钟100次帧刷新,视频中每次展示的静态图像成为帧
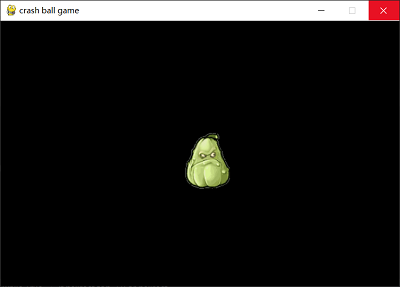
8)完整代码
1 | import pygame |
9)运行效果截图
10)添加速度控制
增加键盘按下事件响应
- “↑”:纵向绝对速度增加一个像素(纵向加速)
- “↓”:纵向绝对速度减少一个像素(纵向减速)
- “←”:纵向绝对速度减少一个像素(横向减速)
- “→”:横向绝对速度增加一个像素(横向加速)
增添如下代码:
1 | elif event.type == pygame.KEYDOWN: # 加入键盘按下事件响应 |
3、屏幕绘制机制
1)游戏屏幕的控制——pygame.display()
2)控制需求
- 游戏全屏
- 游戏屏幕大小可调节
- 游戏屏幕无边框
- 更改游戏标题栏内容
- 更改游戏图标
3)屏幕绘制的重要函数
Ⅰ. 屏幕尺寸和模式
- pygame.display.set_mode(r=(0,0),flags=0) 设置相关屏幕模式
- r是游戏的分辨率,采用(width,height)方式输入
- flags用来控制显示类型,可用 | 组合使用,常用的显示标签如下:
pygame.RESIZABLE 窗口大小可调
pygame.NOFRAME 窗口没有边界显示
pygame,FULLSCREEN 窗口全屏显示 - 注:每种显示方式要配合相应的处理机制。比如大小可调时要有尺寸变化的响应:对扩张显示界面的刷新,对扩张/缩小显示界面的游戏响应
- pygame.VIDEORESIZE是一种窗口大小改变的事件。事件发生后,返回event.size元组,包含新窗口的宽度和高度
.size[0] 宽度,也可以用event.w
.size[1] 高度,也可以用event.h
返回参数只在事件发生时有用
- pygame.VIDEORESIZE是一种窗口大小改变的事件。事件发生后,返回event.size元组,包含新窗口的宽度和高度
- pygame.display.Info() 生成屏幕相关信息
- 产生一个显示信息对象videoInfo,表达当前屏幕的参数信息
在.set_mode()之前调用,则显示当前系统参数信息,参数很多,其中有两个十分重要,如下:
current_w:当前显示模式或窗口的像素宽度
current_h:当前显示模式或窗口的像素高度
- 产生一个显示信息对象videoInfo,表达当前屏幕的参数信息
Ⅱ. 窗口标题和图标
- pygame.display.set_caption(title,icontitle=None) 设置标题信息
- title设置窗口标题内容
- icontitle 设置图标化后的小标题,可选,部分系统没有
- pygame.display.get_caption()返回当前设置窗口的标题及小标题内容,返回结构为(title,icontitle)
- 用途:该函数与游戏交互逻辑相配合,可以根据游戏情节修改标题内容
- pygame.display.set_icon() 设置窗口图标效果,图标是一个surface对象
- pygame.display.get_icon() 获得图标
Ⅲ. 窗口感知和刷新
**pygame.display.get_active()**当窗口在系统中显示(屏幕绘制 / 非图标化)时返回True。否则返回False
pygame.display.flip() 重绘整个窗口
**pygame.display.update()**只重绘改变的部分
Ⅳ. pygame还提供OpenGL和硬件加速
4、事件处理机制
1)pygame中的事件类型
① 系统 ② 键盘 ③ 鼠标 ④ 游戏杆 ⑤ 窗口 ⑥ 用户定义
2)事件处理的重要函数
Ⅰ. 处理事件
pygame.event.get()
从事件队列中获得事件列表,即获得所有队列的事件
1
2
3
for event in pygame.event.get():
if event.type == pyagme.QUIT:
sys.exit()
增加参数,获得某类或某些类事件
pygame.event.get(type)
pygame.event.get(typelist)pygame.event.poll()
从事件队列中获取一个事件
1
2
While True:
event = pygame.event.poll()获取的事件将从队列中删除
如果事件队列为空,则返回event.NOEVENT
pygame.event.clear()
- 从事件队列中删除事件,默认删除所有事件
- 该函数与pygame.event.get()类似,区别仅是不对事件进行处理
- 可以增加参数,指定删除某类或某些类事件:
pygame.event.clear(type)
pygame.event.clear(typelist)
Ⅱ. 操作事件队列
- pygame.event.set_blocked(type or typelist) 控制哪些类型事件不允许被保存到事件队列中
- pygame.event.set_allowed(type or typelist) 控制哪些类型事件允许被保存到事件队列中
- **pygame.event.get_blocked() **测试某个事件类型是否被事件队列所禁止,如果事件队列被禁止返回True,否则返回False
Ⅲ. 生成事件处理函数
- **pygame.event.post(event) **产生一个事件并将其放入事件队列中,一般用于放置用户自定义事件(pygame.USEREVENT)
也可以用于放置系统定义事件(如鼠标或键盘等),给定参数 - pygame.event.Event(type,dict) 创建一个给定类型的事件
其中,事件的属性和值都采用字典类型赋值,属性名采用字符串形式,如果创建已有事件,属性需要一致
Ⅲ. 鼠标事件及类型
- pygame.event.MOUSEMOTION() 鼠标移动事件,返回三个值:
- event.pos 鼠标当前的坐标值(x,y),相对于窗口左上角
- event.rel 鼠标相对移动距离(x,y),相对于上次事件
- event.buttons 鼠标按钮状态(a,b,c) 对应鼠标三个键,鼠标移动时这三个键处于按下状态,对应的位置为1,反之为0
- pygame.event.MOUSEBUTTONUP() 鼠标释放事件
- event.pos 鼠标当前坐标值(x,y),相对于窗口左上角
- event.button 鼠标按下键编号n,取值0/1/2,分别对应三个键
- pygame.event.MOUSEBUTTONDOWN() 鼠标按下事件
- event.pos 鼠标当前坐标值(x,y),相对于窗口左上角
- event.button 鼠标按下键编号n,取值为整数,左键为1,右键为3,设备相关
3)代码演示
描述:模拟鼠标按下、抬起、移动事件,打印对应坐标以及按键编号
1 | import pygame |
4)用户自定义事件演示
1 | import pygame |
5)壁球小游戏扩展
扩展需求:鼠标左键摆放壁球,按键按下时壁球停止运动,按键按下并且移动时,壁球随着鼠标移动,当释放时壁球继续运动
代码略…
5、色彩与绘图机制
1)色彩表达:pygame.Color
- Color类用于表达色彩,使用RGB或RGBA色彩模式,A可选
- Color类可以用色彩名字、RGB值、HTML色彩格式等方式定义
- Color(name) eg.Color(‘green’)
- Color(r,g,b,a) eg.Color(190,190,190,255)
- Color(rgbvalue) eg.Color(‘#BEBEBEFF’),对应十六进制表示
- RGBA多了一个alpha通道,表示不透明度,取值0-255,通道值越大,不透明度越高
2)图形绘制机制
- pygame.Rect表达一个矩形区域的类,用来存储坐标和长度信息
- pygame利用Rect类来操作图形/图像元素,提供如下属性:size、width、height、top、left、bottom、right、topleft…
提供如下方法:.copy()、.move()、… - pygame.draw可绘制多种图形,如
- .rect(Surface,color,Rect,width=0)矩形:Surface矩形的绘制屏幕、color矩形的绘制颜色、Rect矩形的绘制区域、绘制边缘的宽度默认为0即填充图形
- .polygon(Surface,color,pointlist,width=0) 多边形
- .circle(Surface,color,pos,radius,width=0) 圆形
- .ellipse(Surface,color,Rect,width=0) 椭圆形
- .line() 直线
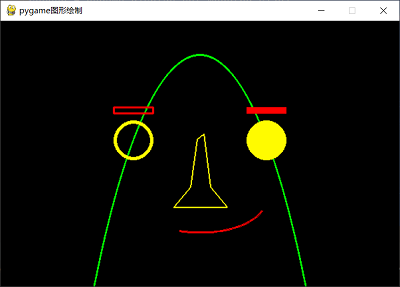
3)图形绘制示例
1 | from math import pi |
运行结果:
4)文字绘制
Ⅰ. 文字绘制机制:
使用pygame.freetype向屏幕上绘制特定字体的文字(需要import引入)注:文字不能直接print(),而是用像素根据字体点阵图绘制
Ⅱ. 生成Font对象
**pygame.freetype.Font(file,size=0)**,根据字体和字号生成一个Font对象
file:字体类型名称或路径,注意字体是否支持中文
size:字体的大小
然后调用Font.render_to()或Font.render()
- **Font.render_to(surf,dest,text,fgcolor=None,bgcolor=None,rotation=0,size=0)**,返回Rect类型
- surf:绘制字体的平面,Surface对象
- dest:在平面中的具体位置,(x,y)
- text:绘制的文字内容
- fgcolor:文字颜色
- bgcolor:背景颜色
- rotation:逆时针的旋转角度,取值0-359,部分字体可旋转
- size:文字大小,赋值该参数将覆盖Font中的设定值
- **Font.render(text,fgcolor=None,bgcolor=None,rotation=0,size=0)**绘制具体文字,返回(Surface,Rect)
- **Font.render_to(surf,dest,text,fgcolor=None,bgcolor=None,rotation=0,size=0)**,返回Rect类型
Ⅲ. Surface讲解
- pygame.Surface 称为绘图层,或绘图平面,或图层
- 用于表示图形、文字或图像的绘制效果,与当前屏幕主图层可以并列存在,如果不绘制在主图层上,则不会被显示
- 主图层由pygame.display.set_mode()生成
- 在主图层上绘制其他图层使用**.blit()**方法:screen.blit(pygame.Surface,pygame.Rect)
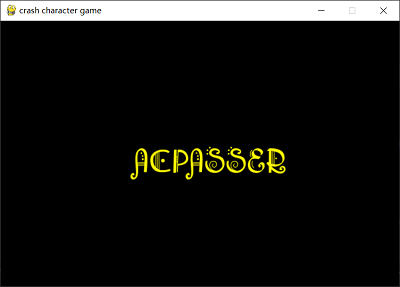
5)将碰壁球用文字来代替
1 | import sys |
效果图: